
Defensive Driving Fundamentals That Actually Matter

Defensive driving isn’t a class you took once. It’s a handful of habits that actually change your odds on the road.

Armando took a defensive driving course once, decades ago, for a ticket he’d rather not get into — and walked away with almost nothing except a vague sense that he was supposed to be “more aware” out there. Aware of what, exactly, nobody ever quite spelled out. Turns out it’s not a vibe, it’s five specific habits, and every one of them is something you could start doing on your very next drive.

👁️ Look Farther Ahead Than Feels Natural

Most drivers fixate on the bumper of the car directly in front of them — which feels responsible, but actually leaves you reacting to trouble at the last possible second, since that’s the only moment you can see it coming.

The fix is to deliberately lift your eyes farther up the road — roughly 12 to 15 seconds ahead of where you are right now, which at typical speeds works out to about a city block. That doesn’t mean ignoring the car in front of you; it means also tracking brake lights two or three cars up, a light about to change, someone stepped off a curb. That extra warning time is what turns a sudden slam-the-brakes moment into a smooth, unremarkable slow-down — the kind of near-miss you never even clock as one.

🔄 Check Your Mirrors on a Schedule, Not Just Before You Need To

Most people only glance in the mirror right before a lane change — which is exactly the moment you’re too busy to actually process what you’re seeing. The better habit is checking every five to eight seconds as a running background task, whether you’re about to move or not.

Think of it like keeping a mental map that’s always roughly up to date, instead of taking a single snapshot right when you need to make a decision. When you build that picture continuously, a car in your blind spot or a gap opening up in the next lane is never a surprise — it’s just an update to something you were already tracking.

🤝 Keep a Running “What If” in the Back of Your Mind

This is really the whole philosophy of defensive driving, boiled down to one habit: constantly asking yourself a quiet, low-key question. What if that car up ahead turns without signaling? What if that pedestrian on the corner steps off the curb before the light changes? What if the car in front of you brakes hard, right now, for no reason you can see yet?

This isn’t about driving scared or expecting disaster around every corner — it’s about always having an escape option already in mind, so if one of those “what ifs” actually happens, you’re not inventing a plan from scratch under pressure. You’re just executing one you’d already half-made.

🚦 Never Assume the Other Driver Has Actually Seen You

A green light or the right-of-way tells you what’s supposed to happen — it doesn’t guarantee the other driver has seen you, is paying attention, or is going to do what the rules say they should. People run lights, misjudge gaps, and pull out while looking at their phone instead of you.

A half-second of hesitation before you proceed — confirming that the other car is actually, genuinely slowing down and not just probably going to — costs you nothing. It’s the cheapest insurance available to you behind the wheel.

🎯 The Real Resource You’re Managing Is Space

Every habit above is really the same idea wearing a different hat: buying yourself space and time to react before a problem becomes unavoidable. Looking farther ahead buys you time. Checking mirrors on a schedule buys you awareness. Keeping a “what if” in mind buys you a plan. Following distance, lane position, and matching your speed to conditions all buy you the same thing — room.

None of these habits require new reflexes or a faster car. They just mean spending your attention a little differently — farther out, more often, and slightly ahead of whatever actually happens.

🛠️ Gear Worth Having

REXING M2 Smart Mirror Dash Cam — built-in blind spot detection adds a genuine extra set of eyes to the mirror-check habit.

Utopicar Blind Spot Convex Mirror — a simple, inexpensive stick-on mirror that shrinks your blind spot with zero installation skill required.

XOOL Emergency Warning Triangle Kit — defensive driving includes what happens after an incident — staying visible to other traffic if you’re ever stopped roadside.

As an Amazon affiliate, I earn from qualifying purchases. Thank you for supporting GrumblePark.

🔗 Related Reads


GrumblePark is part of the WhistleBump Group — find the rest of the family at WhistleBump.com.

44001

©2026 John D Reinhart/GrumblePark.com — All rights reserved
Following Distance: Why the Old Rules Don’t Account for Modern Speeds

The old three-second rule was built for a slower, simpler kind of driving. Here’s what actually determines safe following distance today.

Every driver’s ed instructor in America seems to have learned the exact same eleven words: “count three seconds between you and the car ahead.” It’s tidy, it’s easy to remember, and it’s barely changed since long before anyone had a phone mounted on their dashboard. Chances are you learned it the same way — pick a fixed point, start counting, and if the car ahead beats you to it, back off.

It’s a good rule. It’s just not the whole rule — because “three seconds” at 25 mph in a school zone and “three seconds” at 75 mph on the interstate are not remotely the same amount of actual safety. Here’s what’s really going on, and what to do about it.

⏱️ How the Three-Second Rule Actually Works

Pick something fixed and easy to spot up ahead — a road sign, an overpass, even a particularly ugly pothole. The instant the car in front of you passes it, start counting: “one-Mississippi, two-Mississippi, three-Mississippi.” If you reach that same spot before you finish counting, you’re following too closely. Three full seconds is the traditional floor for a safe gap — not a target to aim for, a minimum not to dip below.

🧠 Why “Stopping” Takes Longer Than It Feels Like It Should

Here’s the part the three-second rule glosses over: “stopping distance” isn’t one thing, it’s two things stacked together.

First there’s reaction time — the gap between your eyes noticing brake lights ahead and your foot actually landing on the brake pedal. Even a fully alert, undistracted driver needs close to a full second for that. You’re not doing anything wrong in that second; that’s just how fast a human nervous system works.

Then there’s braking distance — the distance the car itself travels once the brakes are actually engaged, tires gripping, everything working the way it should. This is where speed stops playing fair.

Braking distance doesn’t grow at the same rate your speed does — it grows much faster, because the energy your brakes have to fight scales with the square of your speed, not with your speed itself. Practically, that means doubling your speed doesn’t just double how far it takes you to stop — it can roughly quadruple it.

Which is exactly why the flat three-second count starts working against you at higher speeds. Three seconds at 30 mph covers around 130 feet — comfortably more room than you actually need to stop.

Three seconds at 75 mph covers over 330 feet, but your real stopping distance at that speed has grown so much faster than your speed did that the same three-second gap now leaves you with a lot less breathing room than it felt like it should.

🌧️ Why Rain, Snow, and Fog Change the Number — Not Just the Speed

All of that math above assumes dry pavement and tires with good grip on the road. Take either of those away and the equation changes fast.

Wet roads mean less friction between your tires and the pavement, so braking distance stretches out — some safety organizations recommend doubling your following distance in rain.

Snow and ice go further still, with some recommending tripling it, because at that point your tires are fighting for grip on a surface that barely wants to give them any.

Fog is its own problem entirely: it doesn’t change your braking physics at all, it just shrinks how much warning you get before you need to react in the first place, so more distance buys you more time to notice trouble developing.

🚛 Why Big Vehicles Need Extra Room — Not Just Extra Respect

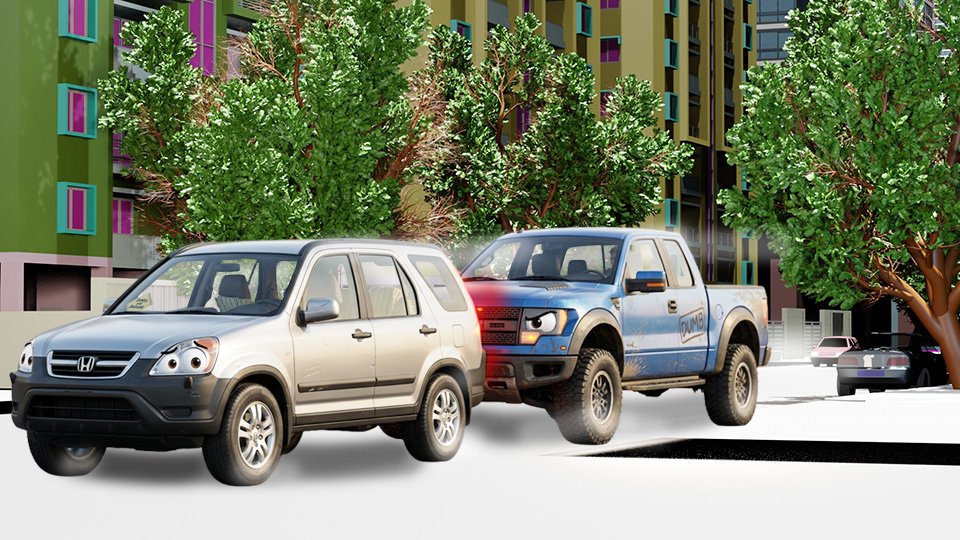
Riding close behind a truck, bus, or RV feels intimidating for good reason, but the real issue isn’t just nerves — it’s two genuine visibility problems happening at once.

First, you lose your own view of the road. A large vehicle blocks your sightline to whatever’s happening two or three cars ahead — brake lights, a sudden lane change, debris in the road — so you end up reacting to the truck’s brake lights instead of the actual situation, which costs you precious reaction time.

Second, if you’re riding in that stretch directly behind a truck’s rear bumper, there’s a real chance you’re sitting in the driver’s blind spot — close enough that their mirrors simply can’t see you’re there. A rough gut check: if you can’t see the truck driver’s side mirrors, assume they can’t see you either.

✅ A Better Mental Model Than One Fixed Number

Instead of treating “three seconds” as a rule you either follow or don’t, it’s more useful to treat it as a floor that moves depending on conditions.

Start at three seconds in good conditions on a dry road.

Add more as your speed climbs.

Add more again for rain, snow, fog, or anything else eating into your visibility or your tires’ grip.

And add more still behind anything bigger than your own car.

None of that requires new math while you’re driving — it just means treating “three seconds” as where the buffer starts, not where it ends.

🛠️ Gear Worth Having

REXING M2 Smart Mirror Dash Cam — documents your actual following distance and any incident objectively, which matters if a tailgating collision ever turns into a dispute.

ACCUTIRE Digital Tire Gauge — correct tire pressure is part of the real stopping-distance equation, not just a following-distance afterthought.

Rain-X Latitude Water Repellent Wiper Blades — better visibility in rain means more warning time, which is exactly what a longer following distance is trying to buy you — and it’s a simple, tool-free install.

As an Amazon affiliate, I earn from qualifying purchases. Thank you for supporting GrumblePark.

🔗 Related Reads


GrumblePark is part of the WhistleBump Group — find the rest of the family at WhistleBump.com.

44008

©2026 John D Reinhart/GrumblePark.com — All rights reserved

Tire Pressure and Handling: Why It’s Not Just About the Tires

Tire pressure isn’t just a maintenance number. It quietly rewrites how your car actually handles.

Amanda has always thought about tire pressure strictly as a wear-and-tear issue — just another number that she’s supposed to pay attention to. How much oil does it have? How much cooling stuff in the radiator? How much air in the tires? Just numbers.

The surprise is that those numbers all affect the operation of the car. In the tire’s case, it can seriously affect how well the car handles. And that, my friend, becomes a safety issue.

🏎️ The Contact Patch Is the Whole Story

Your car is not a light piece of machinery. It can weigh anywhere from three thousand pounds up to three tons, depending upon what it is.

That entire weight rests on the four rubber tires. They’re actually tubes that fit around your wheels, pumped up with air to absorb bumps in the road and give the wheels something with which to grip the road. The tires form the connection between your car above and the roadway below.

Every single thing a tire does — gripping in a straight line, braking, cornering — comes down to one small patch of rubber, roughly the size of your hand, actually touching the road at any given moment.

It’s a patch of rubber doing the same basic job everywhere on the tire, and that job is simply staying pressed flat and even against the road. When you turn a corner, the car’s weight shifts and leans onto the outer edge of the tire for that moment, so the edges do pick up more of the work then — but the second you straighten out, the load spreads back evenly across the whole tire again.

Stretch your hand as wide as you can. Now press it against a table. Which part touches first? That’s exactly like an overinflated tire: the center touches first.

Since the center of the tire is going the work of gripping the road, the edges barely get invited to the party.

Now cup your hand and put it on the table. That’s what underinflation looks like – it still holds the tire shape, but the center has no pressure on it.

🛑 Braking Distance Changes With Pressure

When you step on the brakes, the braking system hydraulically presses brake pads against the car’s wheel to slow it down. But the system relies on the tire’s connection to the road to actually stop the car.

A normally inflated tire is designed to handle the braking function with precision. The air cushion inside provides a rigid structure that helps the car stop correctly.

An underinflated, sagging tire allows a measurable degree of flex that counteracts the efficiency of the braking system. Although the car will stop, the flexing generates heat that reduces the life of the tire and can significantly increase the amount of distance the car needs to fully stop.

Conversely, an overinflated tire sitting high on the crown in the center doesn’t have much surface area to stop the car. That high center heats up, degrading the tire’s lifespan, and, because it doesn’t have as much tread as the whole tire, wants to skip and skid over the road until the car stops. Not safe.

↩️ Cornering Response Changes Too

Dashing around a corner with a set of properly inflated tires is a thing of joy. The car goes exactly where you point it, smoothly and speedily, no questions asked.

Tires that don’t have enough air? That’s another story. Because they sag, the tires allow the car to lean out beyond the contact patch just a little bit. The result is an unsatisfying, mushy control of the car. And that mushy control – you turn the wheel and the flexing tires put up a fight and a delay, could be a real safety issue in some circumstances.

Tires with too much air? Get ready for a harsh and bumpy ride, my friend. Now the tires are riding only on their centers – a contact patch that is smaller than what the car designer had in mind. Every bump comes through the steering wheel, and the car feels like it wants to skitter dart away on its own.

It’s all, and always, about safely controlling the car, isn’t it? You want the car to follow where you point it without question. A moment’s delay, a slight swerve, this way or that, could cause you a real problem in certain traffic situations.

🌡️ Why This Changes With the Seasons

In the hot summertime, your tires might show just a tick more pressure than what’s required. That small degree of overinflation is usually not enough to affect the car’s handling or braking.

But, sustained wintry conditions can cause the moisture in the air in the tires to condense. That condensation reduces the air’s pressure, dropping the the amount of inflation. The drop in inflation can actually affect the tire’s performance, and therefore the car’s handling.

It’s worth checking the pressure every now and then, regardless of the season. Just take a quick tire check every week or so. You’ll feel better knowing what’s going on down there.

⚖️ The Number That Actually Matters

But, how much is the right pressure? Excellent question!

You could just shoot air into it until it looks right. That’s not the wisest solution, as a few pounds above or below the correct inflation pressure could seriously affect the tire’s performance.

You could look on the side of the tire for something labeled PSI (per square inch). DON’T USE THAT NUMBER! That’s the maximum amount of air the tire will handle! Using that PSI will seriously OVERINFLATE the tire!

Believe it or not, the correct pressure printed on a placard inside the door jamb. Open the driver’s door and there it will be, along with some other vital information. That placard was put there before the car left the factory, so you know it’s right.

That, and only that, is the correct pressure for your tires.

🛠️ Gear Worth Having

ACCUTIRE Digital Tire Gauge — quick, accurate checks make it easy to stay at spec rather than guessing by eye.

JACO ElitePro Tire Pressure Gauge — a durable, precise second option for anyone who wants a gauge that lasts years.

DEWALT 20V MAX Tire Inflator — correcting a low reading immediately, in the driveway, rather than hoping it holds until the next gas station.

As an Amazon affiliate, I earn from qualifying purchases. Thank you for supporting GrumblePark.

🔗 Related Reads

GrumblePark is part of the WhistleBump Group — find the rest of the family at WhistleBump.com.

44006

©2026 John D Reinhart/GrumblePark.com — All rights reserved
Winter Driving: Understanding Traction Before You Need It

Winter driving skill is really just traction awareness. Here’s what’s actually happening between your tires and the road — and what to actually do about it.

Amanda grew up somewhere that saw snow twice a decade and moved somewhere that sees it constantly, and has spent every winter since white-knuckling her way through a skill she never actually learned, just sort of absorbed under duress in real time.

Exactly the way you’d learn to swim by being tossed in the deep end, except the deep end is a highway on-ramp.

🧊 What Traction Actually Is

Here’s the whole concept, no jargon required: traction is just grip — the same idea as the difference between walking confidently across a dry sidewalk and shuffling carefully across a wet one in slippery-soled shoes.

Your tires are doing that same job, all the time, gripping the road so that turning the wheel, pressing the brake, or pressing the gas actually translates into the car doing what you asked.

Snow, ice, and even a thin film of water all make the road slipperier under your tires, the exact same way a wet floor makes it slipperier under your shoes — less grip means the car responds less reliably, and sometimes not at all, to the same inputs that work perfectly on a dry day.

🔷 Black Ice: The One You Can’t See Coming

Black ice is the genuinely sneaky one, and worth taking seriously precisely because it doesn’t look dangerous at all.

Black ice is a thin, transparent layer of ice that looks exactly like ordinary wet pavement — no visual warning, no obvious sheen, nothing that would make you ease off the gas the way you naturally would for visible snow or slush.

It tends to show up first in specific, predictable spots: shaded areas that don’t get direct sun, bridges and overpasses (which cool down faster than the open road beneath them, since cold air can reach both the top and bottom of a bridge deck), and during the very early morning or evening when temperatures are dropping or haven’t warmed up yet.

If you’re driving somewhere cold and you cross a bridge or come out of a shaded patch, that’s genuinely worth a small, deliberate mental note — not panic, just quiet extra caution for the next few seconds.

🚗 Smooth Inputs Are the Whole Skill

If there’s one single idea worth actually remembering from this whole post, it’s this one.

Picture carrying a completely full cup of coffee across a room without spilling a drop — you don’t jerk your arm around, you move it smoothly and gradually, because any sudden motion sloshes the coffee right out.

Your tires’ grip on a slippery road works almost exactly the same way. A sudden, sharp turn of the wheel, a hard stomp on the brake, or flooring the gas pedal are all the driving equivalent of jerking that coffee cup — on dry pavement your tires have enough grip to absorb it, but on snow or ice, that same sudden input is far more likely to break the tires loose from the road entirely.

Winter driving skill isn’t some separate, advanced technique — it’s genuinely just turning, braking, and accelerating more gradually than instinct tells you to, every single time.

🔢 Why Slowing Down Isn’t Just About Stopping Distance

Stopping distance on ice or snow can be several times longer than on dry pavement — meaning a stop that would normally take you the length of a couple of car lengths might now take the length of a whole city block.

But there’s a second, quieter benefit to driving slower that’s just as important: speed itself eats up your reaction time.

Going slower means more literal seconds between spotting a problem ahead and needing to actually respond to it — which matters just as much as shorter stopping distance, especially on a road where visibility and traction are both already working against you.

🛡️ All-Wheel Drive Helps You Go, Not Stop

This is one of the most common, genuinely understandable misconceptions out there, and it’s worth clearing up plainly: all-wheel drive helps put power down to all four tires at once when you’re accelerating from a stop, which is exactly why an AWD car can pull confidently out of a snowy parking spot that leaves a two-wheel-drive car spinning helplessly in place.

But braking and steering don’t work through that same system at all — when you press the brake pedal, every car, AWD or not, is relying on the same four tires gripping the same slippery road to actually slow down.

An AWD vehicle that got moving impressively well on snow can still take exactly as long to stop as a plain two-wheel-drive car on that same surface. AWD gets you unstuck. It does not, on its own, get you stopped.

🎯 The Phrase Worth Carrying Into Every Winter Drive

Everything above is worth knowing, but on an actual icy morning, with your hands already on the wheel, you don’t need a lecture — you need something short enough to just repeat to yourself. Here’s the one:

Slow Hands, Slow Feet.

Slow hands means every steering input stays gentle and gradual — no sudden corrections, even if something startles you.

Slow feet means the same discipline applies to both pedals — easing onto the brake and gas rather than stabbing at either one. Four words, covering the entire actual skill this post is built around.

If the road looks even a little suspicious — a shaded patch, a bridge, a morning that hasn’t warmed up yet — slow hands, slow feet is the whole plan, no diagnosis required first.

🛠️ Gear Worth Having

AutoSock Textile Snow Socks — a compact, glovebox-friendly traction option — they slip over the tire, no jack or tools required, genuinely easy even in a parking lot mid-storm.

XOOL Emergency Warning Triangle Kit — winter conditions raise the odds of needing to be visible roadside — worth keeping in the trunk all season.

ACCUTIRE Digital Tire Gauge — cold weather drops tire pressure, and correct pressure is part of the traction equation too.

As an Amazon affiliate, I earn from qualifying purchases. Thank you for supporting GrumblePark.

🔗 Related Reads


GrumblePark is part of the WhistleBump Group — find the rest of the family at WhistleBump.com.

44004

©2026 John D Reinhart/GrumblePark.com — All rights reserved
Terminal Corrosion: Why It Happens and How to Clean It

That crusty blue-white buildup on your battery terminals isn’t just ugly. It’s actively cutting off your car’s electrical connection.

Armando popped his hood one day and found what looked like a small, crumbly blue-white coral reef growing on his battery terminals — not something he’d been warned to look for, and not something that seemed, at a glance, like it could possibly be causing the sluggish starts he’d been chalking up to “just getting cold out.”

🧪 What That Buildup Actually Is

Battery terminal corrosion is typically a chemical reaction between escaping hydrogen gas (a normal byproduct of a battery’s operation) and the metal of the terminal — forming that crusty, powdery deposit, usually more blue-green on the positive terminal and whiter on the negative.

⚡ Why It’s More Than Just Unsightly

Your car’s battery leaps into life supplying the burst of power needed to crank the engine — meaning physically spin it over fast enough for the whole combustion process to kick in and take over — before it starts. Less like a phone battery slowly running down, more like a compressed spring, built to release everything it’s got in one sudden moment, on demand.

Corrosion is an insulator — it physically gets between the metal-to-metal contact the terminal needs to conduct electricity properly. When the battery releases everything it’s go in one blast, that corrosion can keep all that energy from getting to the starting system.

A car with significant terminal corrosion can crank slower or fail to start entirely, even with a perfectly healthy battery underneath all that buildup.

🙋 The Realistic Plan: Let Someone Else Handle It

A regular mechanic or full-service shop can absolutely do this. It’s honestly one of the smaller, easier items on a typical service visit — worth mentioning next time you’re in for an oil change rather than booking a separate appointment just for this. “Can you check and clean my battery terminals while you’re in there?” is a completely normal, easy thing to ask.

Auto parts stores are a maybe, worth asking rather than assuming. Some will clean corroded terminals for you on the spot, especially if you’re already there buying a battery — but it’s not a universally guaranteed free service the way battery testing usually is, and a few will hand you a cleaning spray and point you toward doing it yourself instead. A quick “would you be able to clean these while I’m here?” settles it fast either way.

What to expect cost-wise: this is genuinely one of the cheapest things you can ask a shop to do — a few dollars in parts, a few minutes of labor. If someone quotes you something that sounds like a real repair bill for cleaning a set of terminals, that’s worth a second opinion, not just an automatic yes.

🧤 If You’d Rather Do It Yourself, Here’s How

That crusty, blue-white buildup genuinely looks alarming up close — like something growing where it shouldn’t be — and it’s completely fair to feel a little hesitant about reaching toward it. Good news: handled the right way, this is one of the lower-risk jobs in this whole category. A pair of old dish gloves and maybe some safety glasses (corrosion dust plus the cleaning paste isn’t something you want in your eyes) is genuinely all the protection this calls for.

Step one: disconnect the terminals, negative first. Each terminal is held onto its post (the metal stud sticking up out of the battery) by a clamp, tightened with a small nut or bolt — usually a 10mm size, though it’s worth checking yours before you start.

Loosen that bolt with a wrench, turning it counterclockwise, until the clamp is loose enough to wiggle. It might be stubborn or a little stuck from the corrosion itself — gentle side-to-side rocking usually works it free without needing to force anything.

Do the negative terminal (marked with a , usually black) first, then the positive (marked +, usually red). This order matters for the safety reason detailed below – it minimizes the chance of an accidental spark while you’re working right next to the battery.

Step two: make the paste, and don’t be alarmed by the fizzing. Mix a small amount of baking soda with a little water until it’s roughly the consistency of toothpaste. Dab it directly onto the corrosion with an old toothbrush or the terminal brush itself. It’s normal — expected, even — for it to bubble or fizz gently the moment it touches the corrosion. That’s the baking soda actively neutralizing it, not a sign anything’s going wrong.

Step three: scrub. A terminal brush is a small tool, usually with two different wire-bristle ends — one shaped to fit around the post itself, the other shaped to fit down inside the clamp. Work each one gently until the metal underneath looks clean and shiny again rather than crusty or discolored.

Once you’re done, a quick wipe with a damp rag and a wash of your hands, and that’s genuinely the whole job — messier-looking than it is difficult.

🔁 Reconnecting in the Right Order

Positive terminal first, negative terminal second — the reverse of how you disconnected them, and here’s the real reason it matters for this job specifically: while you’re working, your wrench is a piece of metal that could accidentally brush against the car’s metal body.

If the negative terminal is still connected while you’re touching the positive one, that accidental brush completes a circuit straight through the wrench itself — a spark, and possibly a wrench that gets uncomfortably hot in your hand.

Disconnecting negative first breaks that path immediately, so if the wrench slips while you’re still working on the positive side, there’s nothing for it to accidentally complete.

Reconnecting in reverse — positive first, negative last — keeps that same protection in place the whole time you’re working.

🛡️ Preventing the Comeback

A thin coat of dielectric grease on the cleaned terminals creates a barrier against the moisture and gas exposure that caused the corrosion in the first place — a five-minute step that meaningfully slows how fast it comes back.

Nothing about cleaning battery terminals requires you to be the one doing it — this is a small, quick, genuinely inexpensive job for a mechanic, and asking for it costs you nothing but the question.

🛠️ Gear Worth Having

Steelman Battery Post Terminal Cleaner — a steel-bristle brush sized specifically for both top-post and side-post terminals.

NOCO NCP2 Battery Terminal Cleaning Kit — cleaner spray, brush, and anti-corrosion washers together in one kit.

Permatex Dielectric Grease — the standard, trusted protective coating for keeping cleaned terminals clean longer.

As an Amazon affiliate, I earn from qualifying purchases. Thank you for supporting GrumblePark.

🔗 Related Reads


GrumblePark is part of the WhistleBump Group — find the rest of the family at WhistleBump.com.

43005

©2026 John D Reinhart/GrumblePark.com — All rights reserved
Fuses and Relays: The Electrical System’s Circuit Breakers

A dead radio or a window that won’t roll down is usually a two-dollar part, not a two-hundred-dollar repair. Here’s how to check first — and what you’re actually looking at when you do.

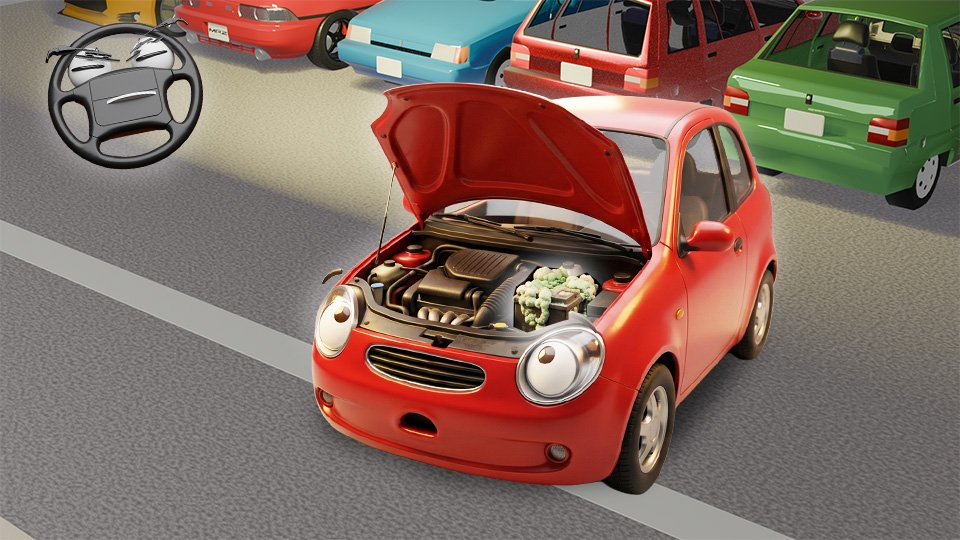
Amanda’s cigarette lighter outlet stopped charging her phone one day, and her first instinct was to assume something expensive and internal had failed. It was a two-dollar fuse. It’s very often a two-dollar fuse.

⚡ First, What a Fuse Actually Does

Picture your car’s electrical system like water flowing through a hose — electricity is the water, and the wire is the hose carrying it to wherever it’s needed, whether that’s a headlight, a radio, or that cigarette lighter outlet.

Too much water pressure can burst a hose or damage whatever it’s connected to; too much electrical current can overheat a wire and, in a worst case, start a fire.

A fuse is a deliberately weak link built into that path on purpose – a thin metal wire designed to melt and break the connection the instant too much current tries to push through it, sacrificing itself to protect the far more expensive wiring and components downstream. When a fuse “blows,” it didn’t fail. It did exactly the job it was built for.

When something electrical in the car stops working, be it the radio or a phone charger or even the power windows, the first suspect in the lineup is a fuse.

🔌 What Are We Even Talking About?

Before diving in, a quick picture of the two parts this whole post is about.

A fuse is a small plastic housing, usually about the size of your pinky nail, with two metal prongs sticking out the bottom and a thin wire visible right through the clear or colored plastic connecting them.

A relay is a small, boxy plastic cube, usually an inch or so across, that plugs into its own slot the same way a fuse does, just bigger. Both live in the same general neighborhood — a fuse box — and both exist to protect your car’s electrical system, just in slightly different ways.

🔍 Finding the Fuse Box

Most cars have two fuse boxes — one tucked inside the cabin, usually a black plastic panel near the driver’s left knee or behind a small door on the dashboard, and a second one under the hood, typically a larger black box sitting near the battery.

Both usually have a lid that pops or unclips off, and printed on the underside of that lid is almost always a small diagram — a grid of icons or abbreviations, each one lined up with a specific fuse slot, telling you which fuse controls which part of the car.

Your owner’s manual will point you to the exact location for your specific model if you can’t spot either box right away.

🔧 How to Actually Check and Swap One

Pull the suspect fuse straight up and out using a small plastic fuse puller — a little tool shaped like a pair of tweezers, usually clipped into the fuse box itself.

Hold the fuse up to a light and look at that thin wire running between the two prongs: intact and unbroken means the fuse is fine, visibly snapped or blackened means it’s blown.

Pushing a new one in is genuinely as simple as it sounds — line up the prongs and press down firmly until it seats, no different from swapping a small lightbulb.

One detail that actually matters here: every fuse is stamped with a number (its amperage rating) and color-coded to match, and your replacement needs to match the blown one exactly — never a higher number “just to be safe.”

A higher-rated fuse defeats the entire point of having one at all, letting more current through than the wiring behind it was ever designed to handle safely.

🔁 Relays, Briefly

A relay solves a different problem: some parts of your car — like your headlights — need a lot of power to run, more than the thin little wire running to your dashboard switch could safely carry all the way.

So instead, that thin wire carries just a small trigger signal to the relay, and the relay itself, sitting closer to the part that needs the power, completes a separate, heavier-duty circuit using its own thicker wiring.

Think of it like a doorbell: pressing the button doesn’t power the chime directly through the wire in your hand — it just sends a small signal that tells a separate, more capable circuit to do the actual work.

If swapping a fuse doesn’t fix the issue and a relay’s suspected instead, that’s a good moment to hand it off to a shop — confirming a relay’s actually bad involves swapping it against a known-good one to compare, a step beyond what’s worth owning special tools for over a single incident.

⚠️ When a Blown Fuse Means Something Else Is Wrong

If a fresh replacement fuse blows again immediately, that’s not bad luck — somewhere downstream, two wires that shouldn’t be touching are touching (called a short circuit), creating an unintended path that draws far more current than the circuit was ever meant to carry.

Repeatedly swapping in fresh fuses just keeps sacrificing two-dollar parts to paper over a real problem underneath. A repeat blow is the actual signal to stop and get it looked at, not a reason to try a third fuse.

🗣️ Even If You’d Rather Not Do This Yourself, It’s Still Worth Knowing

Maybe popping open a fuse box and poking around under there just isn’t something you want to do, and that’s completely fine — nothing above requires you to become the person who does it. But knowing what you just read still pays off the moment you’re standing at a mechanic’s counter, in a few concrete ways.

You can describe the actual problem, not just the symptom. “My cigarette lighter stopped working” gets you a diagnostic fee and a wait. “My cigarette lighter stopped working, and I checked the fuse box diagram — it’s fuse 23, and it looks blown to me” gets you straight to a two-minute fix, because you’ve already done the hardest part of the diagnosis yourself.

You’ll know if a quote actually makes sense. If a shop tells you it’s a blown fuse, you now know that’s genuinely a couple of dollars in parts and a couple of minutes of labor — not a $150 job. That doesn’t mean every shop is trying to take advantage of you; a legitimate diagnostic fee for tracking down which fuse and why it blew is real, honest work. But you’ll be able to tell the difference between “we found and fixed a simple fuse” and “we’re charging you like this was something bigger,” and ask the right follow-up question if the two don’t line up.

You’ll know what question actually matters. A single blown fuse, once, is usually nothing. A fuse that keeps blowing is a real problem hiding underneath it. Knowing that distinction means you can walk in and ask specifically, “was it just the fuse, or is something making it blow?” — the exact question that separates a simple swap from a repair that’s actually being deferred.

None of this requires you to ever touch a fuse box yourself. It just means you’re never standing there nodding along to something you don’t understand — you’re asking the one question that actually protects your wallet

🛠️ Gear Worth Having

Automotive Fuse Assortment Kit — keep the common amperage ratings on hand so a blown fuse is a two-minute fix, not a trip to the store.

Vehicle Maintenance Log Book — note which fuse blew and when — useful if it turns out to be a repeat problem worth mentioning to a mechanic.

As an Amazon affiliate, I earn from qualifying purchases. Thank you for supporting GrumblePark.

🔗 Related Reads


GrumblePark is part of the WhistleBump Group — find the rest of the family at WhistleBump.com.

43004

©2026 John D Reinhart/GrumblePark.com — All rights reserved
How to Jump-Start a Car the Right Way

Jumper cables have a correct order and most people learn it wrong, or not at all. Here’s the actual right way.

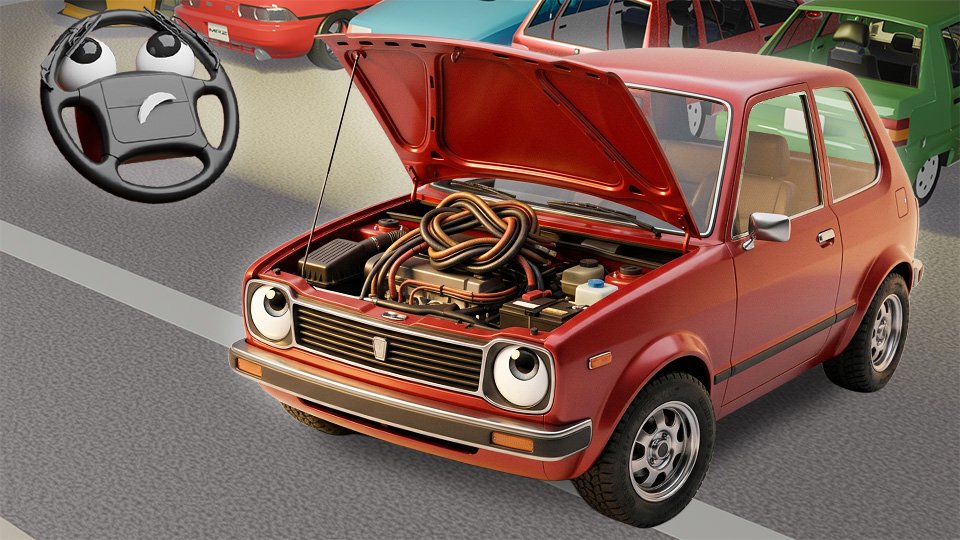
Armando has jump-started a car exactly twice in his life, both times by shouting the general concept of “red to red, black to black, I think?” across a parking lot while a stranger held the other end of the cables, and both times it worked, which taught him precisely nothing about whether he’d actually done it correctly.

🔴 The Order Actually Matters

Connect in this exact sequence:

  • positive (red) clamp to the dead battery’s positive terminal,
  • positive (red) clamp to the good battery’s positive terminal,
  • negative (black) clamp to the good battery’s negative terminal,
  • and the final negative (black) clamp to an unpainted metal surface on the dead car’s engine or frame — not the dead battery’s negative terminal itself.

That last detail is the one almost everyone skips, and it’s there for a real reason.

⚡ Why the Last Clamp Doesn’t Go on the Battery

Inside your car’s battery are a bunch of plates — some made of lead, some made of lead dioxide — stacked in alternating layers and dunked in a bath of sulfuric acid mixed with water, called the electrolyte. Charging a battery involves a chemical process that naturally produces a small amount of hydrogen gas as a byproduct — this is completely normal, expected behavior for a healthy, undamaged battery, not a sign anything’s wrong with it. And a jump start is exactly the kind of situation that produces more of it than usual: you’re pushing a strong burst of current into a battery to recharge it quickly, which is precisely the condition that increases hydrogen venting.

So there’s a small amount of that gas present essentially every time you jump-start a car, healthy battery or not — which is exactly why the final clamp still doesn’t go on the battery itself.

Connecting it directly to the dead battery’s negative post creates a spark right at the exact spot where that gas is naturally escaping, a genuine, if uncommon, explosion risk.

Grounding it to bare metal elsewhere on the engine puts that final spark safely away from the battery, gas or no gas — treat it as standard procedure every time, not just a precaution for a battery that looks damaged.

🔇 Which Car Goes First

Once the cars are connected, start the working vehicle and let it run for a couple of minutes before attempting to start the dead one.

When you first start a car, the battery uses all of its cold-cranking amps to turn the engine over and get it started.

Running the engine on the operation car allows the good battery to begin feeding the dead with one some charge before you ask the dead car’s starter motor to do its harder work.

❌ What to Never Do

Never jump a battery that’s visibly cracked, leaking, or frozen — all three carry real risk of rupture under the added electrical load.

And NEVER let the two clamps touch each other while the other ends are connected to anything!

This is a genuinely bigger deal than it sounds. The moment a red (positive) clamp touches a black (negative) clamp, you’ve created a direct short circuit: an almost zero-resistance path straight between the battery’s two terminals, with none of the car’s normal electrical components in the way to control how much current flows.

Under normal operation, electricity flowing through your car’s wiring is limited and managed by everything it’s actually powering — headlights, the starter motor, and so on.

A direct clamp-to-clamp touch skips all of that entirely, and a car battery (especially with a second battery or jump starter also feeding into the circuit) can push a genuinely massive burst of current through that accidental connection in an instant.

That sudden surge generates real heat at the contact point almost immediately — enough to throw sparks, enough to burn you if you’re holding the clamps when it happens, and enough to damage the clamps or cables themselves.

And remember that hydrogen gas we mentioned a battery can vent, especially one that’s been under load — a spark landing near that gas is exactly the kind of ignition source that turns “oops” into something genuinely dangerous.

The practical takeaway: treat the two colors like they’re supposed to be strangers for the entire process. Keep the loose ends physically separated as you work, don’t let extra cable coil up in a way where a stray clamp could flop against the wrong one, and connect them one at a time in the order already covered above, rather than holding both ready in the same hand.

🔋 Portable Jump Starters: The No-Second-Car Option

A portable lithium jump starter carries its own charge and needs no second running vehicle at all.

Connect its clamps directly to the dead battery, following the same red-then-black order, and it supplies the jump on its own.

Genuinely useful for anyone who’s ever been stuck alone with no one to ask for a favor.

📺 Worth Watching Once Before You Try It

Everything above explains the why — why the order matters, why the last clamp goes on bare metal instead of the battery itself, why the colors need to stay strangers.

But there’s a real gap between reading about clamping a cable onto a terminal and actually doing it with your own hands, in a slightly awkward engine bay, on the first cold morning you actually need to.

A quick video search for “how to jump start a car” gives you that missing piece — watching someone’s hands move through the actual sequence once, seeing exactly what a battery terminal looks like in real life, what a confident clamp connection looks and sounds like versus a loose one.

It doesn’t replace anything covered here; it just turns the steps from something you’ve read into something you’ve already watched happen, so the first time you’re doing it for real isn’t also the first time you’re seeing it done.

🛠️ Gear Worth Having

NOCO Boost X GBX155 Jump Starter — a genuinely powerful, well-reviewed portable jumper that handles larger engines without needing a second car.

LOKITHOR JT400 Jump Starter with Battery Tester — combines the jump-start function with a built-in tester, so you can check the battery’s health right after.

As an Amazon affiliate, I earn from qualifying purchases. Thank you for supporting GrumblePark.

🔗 Related Reads


GrumblePark is part of the WhistleBump Group — find the rest of the family at WhistleBump.com.

43001

©2026 John D Reinhart/GrumblePark.com — All rights reserved
Why Your Dome Light Left On Overnight Can Kill Your Battery

A single interior light, left on overnight, can genuinely drain a healthy battery flat. Here’s the actual math behind it.

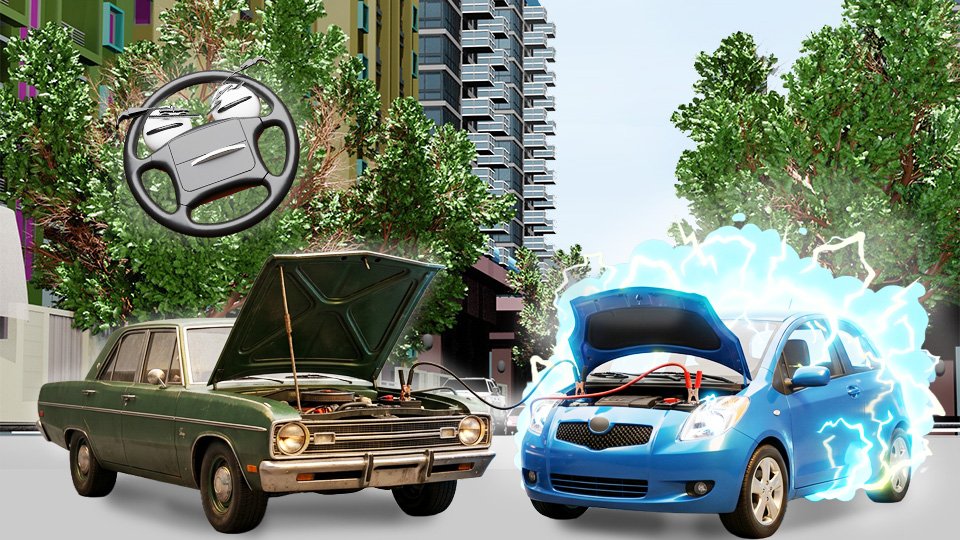
Amanda left her car door slightly ajar overnight once, just enough that the dome light stayed lit, and woke up to a completely dead battery — a genuinely surprising outcome for a light that seemed far too small and dim to be capable of that much damage.

🔋 The Actual Math

A typical dome light draws somewhere around 5–10 watts. Left on for eight hours overnight, that’s a small but entirely real, continuous drain on a battery that was never designed to be a long-duration power source.

Your car’s battery is not designed to power something steadily for hours — it’s built to sit there fully charged, doing basically nothing, until you turn the key or push the button.

⚡ Why a Small Draw Adds Up to a Big Problem

A car battery has a limited reserve capacity, and drawing it down slowly overnight can leave too little charge for the much larger current spike a starter motor needs the next morning.

When you turn the key, the battery wants to leap into life, supplying the burst of power needed to crank the engine — meaning physically spin it over fast enough for the whole combustion process to kick in and take over.

But the slow, steady drain of the dome light all night long means there’s no reserve in the battery – not enough energy to kick over the engine.

🔍 Parasitic Draw: The Sneakier Version of the Same Problem

Beyond an obviously-left-on light, cars have a normal, small “parasitic draw” from the clock and alarm system that stays lightly powered even when parked and locked — usually small enough a healthy battery handles it easily.

An abnormally high parasitic draw can drain a battery over a couple of days even with everything switched off.

Diagnosing that specific cause is genuinely a shop job — tracking down which circuit is the culprit takes specialized testing beyond a simple check.

🚗 Why Modern Cars Mostly Prevent This

Many newer vehicles include an automatic interior light shutoff specifically to prevent this scenario.

But, if your car is more than a decade or so old, or if you’ve noticed the light staying on longer than it used to, worth checking whether that safeguard is present at all.

✅ The Habit Worth Building

A quick glance back at the car after parking — confirming the dome light is off and doors are fully latched — costs nothing and prevents the single most common, most avoidable overnight battery kill.

🛠️ Gear Worth Having

NOCO Boost X GBX155 Jump Starter — keep one in the trunk for exactly this morning-after scenario.

NOCO NCP2 Battery Terminal Cleaning Kit — a battery already stressed by overnight drains benefits from clean, corrosion-free terminals doing their full job.

As an Amazon affiliate, I earn from qualifying purchases. Thank you for supporting GrumblePark.

🔗 Related Reads


GrumblePark is part of the WhistleBump Group — find the rest of the family at WhistleBump.com.

43010

©2026 John D Reinhart/GrumblePark.com — All rights reserved
Oil Changes: Conventional vs. Synthetic and Why Intervals Differ

The 3,000-mile oil change rule is decades out of date for most cars. Here’s what actually determines your interval, and what to ask for.

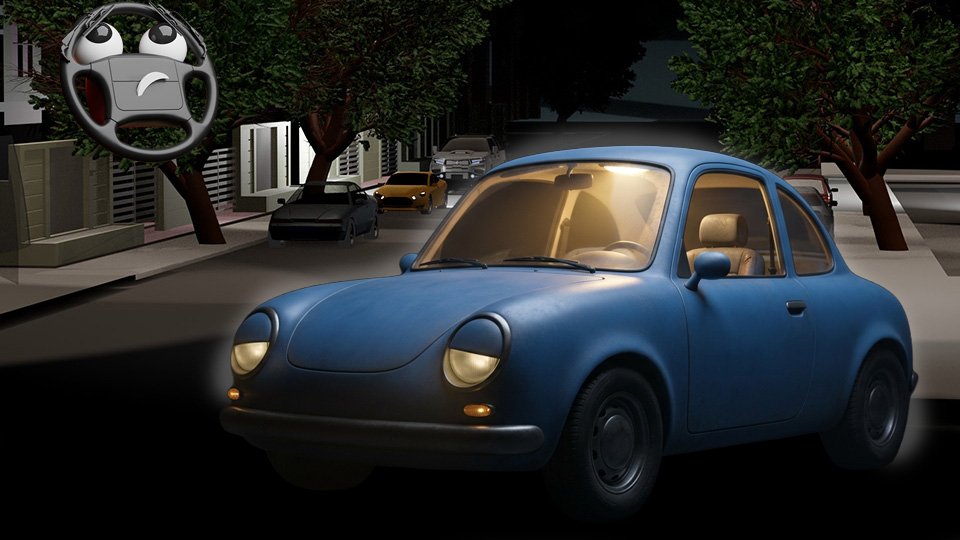
Armando’s dad changed his oil every 3,000 miles without fail, a rule Armando absorbed as gospel. Every 3,000 miles. Got it, Dad.

But the owner’s manual on Armando’s car actually recommends something closer to 7,500 to 10,000 miles. So, when should he get the oil changed?

Neither of them was wrong for their era. The 3,000-mile rule is just genuinely outdated for a modern engine running modern oil.

Before landing on the actual number, though, it’s worth answering a more basic question first: does any of this really matter? Could Armando just ignore both his dad’s rule and that little dashboard reminder entirely and be fine?

🚨 What Actually Happens If You Just Skip the Oil Changes

Here’s the honest answer: for a while, nothing visibly bad happens — which is exactly what makes this so easy to keep putting off. But remember everything oil is actually doing under the hood: lubricating moving metal parts, carrying heat away, and keeping tiny combustion byproducts suspended so they don’t cake onto engine surfaces. Old, worn-out oil gets progressively worse at all three jobs at once, not just one.

As it breaks down, oil thickens and loses its ability to flow smoothly and cushion metal parts the way it’s supposed to — which means more direct metal-on-metal friction, more heat, and more wear happening every single time you drive.

At the same time, it stops effectively carrying away the tiny particles it’s supposed to be trapping, so instead of getting flushed out at your next oil change, that debris starts building up inside the engine as a thick, dark sludge. Sludge clogs the narrow passages oil is supposed to flow through freely, which starves parts of the engine of proper lubrication — the exact problem oil exists to prevent in the first place, now happening because of the oil itself.

None of this shows up overnight. It’s slow, cumulative damage that quietly shortens your engine’s life — and by the time it does become obvious (a knocking sound, a warning light, reduced performance), you’re usually looking at a real repair bill, not just an overdue oil change.

🔔 What That Dashboard Reminder Actually Is (and Isn’t)

Worth knowing exactly what that little icon represents, since it’s not always what people assume.

On plenty of cars, it’s simply a mileage counter — reset by whoever performs the service, counting back down from your manufacturer’s recommended interval, with no actual sensor checking your oil’s real condition at all.

Some newer vehicles do have a more sophisticated oil life monitoring system, which factors in things like how hard you’ve been driving and how hot the engine’s been running to estimate genuine remaining oil life rather than just counting miles.

Either way, the light coming on means the same practical thing: it’s time, not a suggestion to negotiate with.

So the light isn’t nagging you for no reason — it’s just not very good at explaining itself. Here’s what it’s actually tracking, and why the number it’s tracking toward has changed so much since your dad’s day.

⚗️ Should I Use Conventional Oil?

Crude oil is the thick, dark, unrefined liquid pumped straight out of the ground — a genuinely messy mixture of countless different-sized molecules all jumbled together.

Conventional motor oil is made by refining that crude oil (essentially filtering and separating it) into something usable, but with comparatively little further processing beyond that basic cleanup. It’s been made this same fundamental way since the early 1900s — solid, proven technology, just not a particularly sophisticated one by modern standards.

The problem is those leftover, unevenly-sized molecules. Think of it a little like cooking oil that’s been used and reheated one too many times in a pan — eventually it starts breaking down, thinning out, losing whatever it was doing well in the first place.

Conventional motor oil does something similar under the sustained heat of an engine: those inconsistent molecule sizes create weak points that break down faster than a more uniform structure would, which is exactly why conventional-oil intervals tend to sit shorter — often in the 3,000 to 5,000 mile range.

🧪 Synthetic Oil: Built From the Molecule Up

Full synthetic oil skips that “dig it up and lightly clean it” approach entirely. Instead, it’s chemically engineered — built in a lab, molecule by molecule, rather than simply filtered from whatever crude oil happened to contain. The result is a much more consistent, uniform structure, without those weak, unevenly-sized molecules that conventional oil is stuck with.

That consistency is exactly what makes it hold up so much better under stress — it resists breaking down at both high temperatures (like a hot engine working hard on the highway) and low ones (like a cold engine cranking to life on a January morning) far better than conventional oil manages.

It’s the same underlying idea as swapping a natural fiber that frays and weakens with wear for a synthetic one engineered to hold its structure — which is exactly why synthetic intervals stretch out to 7,500–10,000 miles or more on many vehicles, sometimes further.

📖 The Number That Actually Matters

Dad said every 3,000 miles without fail. The car recommends 7,500. Which is correct?

Here’s one answer: they’re both correct. You CAN change your oil every 3,000 miles, no matter what the manual says. There’s no harm in it, and the Quik-Lube place will love you for it. But you’re just wasting oil and money -a lot of both.

The right answer: your owner’s manual’s recommended interval, for the oil type your engine actually requires, beats any generic rule — including this article’s.

Many modern engines specify synthetic oil as a requirement, not an upgrade option. This is the single most useful thing to know walking into any oil change conversation, whether you’re doing it yourself or having a shop handle it.

🔧 Doing It Yourself vs. Having It Done

An oil change is one of the more approachable DIY jobs on a car — but it also involves safely getting under the vehicle, dealing with hot used oil, and disposing of it properly, which is genuinely more involved than topping off a fluid.

Plenty of confident, capable people have a shop handle this one and DIY the smaller stuff instead, and that’s a completely reasonable line to draw.

🛠️ Gear Worth Having

Mobil 1 Synthetic Motor Oil — worth knowing the brand and spec your engine actually calls for, whether you’re buying it for a shop visit or doing it yourself.

EWK Flexible Oil Funnel — genuinely useful even if you’re not doing full oil changes — makes topping off between services a clean, simple job.

Vehicle Maintenance Log Book — note the date, mileage, and oil type every time — the easiest way to never wonder if you’re overdue.

As an Amazon affiliate, I earn from qualifying purchases. Thank you for supporting GrumblePark.

🔗 Related Reads


GrumblePark is part of the WhistleBump Group — find the rest of the family at WhistleBump.com.

42002

©2026 John D Reinhart/GrumblePark.com — All rights reserved