

What’s Actually Different About EV Maintenance

An EV skips oil changes entirely but doesn’t skip maintenance altogether. Here’s what actually moves to the front of the list.

Armando’s neighbor bought an EV and has mentioned, more than once, that he “never has to change the oil again.” True, and also not remotely the whole maintenance story — an EV trades one set of maintenance items for a genuinely different set, not for nothing at all.

❌ What Genuinely Disappears

No engine oil, no oil filter, no spark plugs, no serpentine belt, no timing belt or chain. No exhaust pipe, no catalytic converter, no mufflers. All the greasy, oily, dusty stuff you pay somebody else to deal with? Gone.

The entire internal combustion maintenance list simply doesn’t apply, since there’s no internal combustion engine in there to maintain. If you’re not a gearhead, that’s a genuine bonus.

🛑 What Actually Lasts Longer: The Brakes

Before getting into what’s different about EV brakes, here’s a quick refresher on how regular car brakes work at all: each wheel has a flat metal disc called a rotor, spinning right along with it. A clamp-like part called a caliper squeezes two pads against that spinning rotor from both sides. That squeeze — the pads pressing against the spinning rotor — is what actually creates the friction that slows the car down, and it generates real heat in the process

EVs use the electric motor itself to slow down the car. It’s a process called regenerative braking. The EV recaptures energy back into the battery for most everyday stops, with the physical brake pads engaging far less often.

Brake pads on an EV commonly last well beyond your typical gas-car interval.

🛞 What Actually Wears Faster: The Tires

Two things about EVs quietly wear tires down faster than a gas car does.

First, weight: EVs carry a large, heavy battery pack, often adding hundreds of pounds compared to a similar gas vehicle — and more weight pressing down means more force grinding against the road with every mile.

Second, torque (the twisting force that actually gets the wheels turning): electric motors deliver their full power instantly, the moment you press the pedal, rather than building up gradually the way a gas engine does.

That instant punch is part of what makes EVs feel so quick off the line — it’s also exactly the kind of sudden force that scrubs rubber off a tire faster.

Put the two together, and it’s no surprise EV owners often find themselves checking tread depth and rotating tires more often than they would have in a comparable gas car, not less.

🔋 The Battery Itself: Different Rules Entirely

There’s no dipstick to check or filter to swap on an EV’s battery, but that doesn’t mean it’s totally hands-off — a few charging habits genuinely affect how well it holds up over the years.

Batteries like living in the middle of their range, not the extremes: routinely charging all the way to 100%, or letting it sit nearly empty for long stretches, both put extra strain on the battery’s chemistry over time It’s similar to how constantly maxing out or draining a phone battery wears it down faster than keeping it comfortably in between.

And DC fast charging — while genuinely useful for road trips — generates real heat in the battery each time it’s used, so leaning on it for your everyday charging instead of saving it for occasional long drives adds up to more wear than a slower overnight charge at home would.

❄️ Cabin Air Filter and Coolant: Still on the List

A couple of items from the traditional checklist do survive the jump to electric, though, and they’re easy to forget precisely because everything else on this list just disappeared.

The cabin air filter — the one covered elsewhere on this site, cleaning the air blowing through your vents — works exactly the same on an EV as it does on any gas car, and it still needs periodic replacement.

And most EVs also have a coolant system, similar in concept to a gas car’s, except here it’s managing heat from the battery pack and electric motor instead of a combustion engine.

Both are genuinely still real maintenance items, worth keeping on your radar even though the rest of the traditional under-hood checklist has largely emptied out.

🛠️ Gear Worth Having

TEKTON 5941 Digital Tire Gauge — with tire wear accelerated on most EVs, regular pressure and tread checks matter more, not less.

Autel AL319 OBD2 Scanner — many EVs still support OBD2-style diagnostic reads for the non-battery systems they do have.

As an Amazon affiliate, I earn from qualifying purchases. Thank you for supporting GrumblePark.

🔗 Related Reads


GrumblePark is part of the WhistleBump Group — find the rest of the family at WhistleBump.com.

43007

©2026 John D Reinhart/GrumblePark.com — All rights reserved
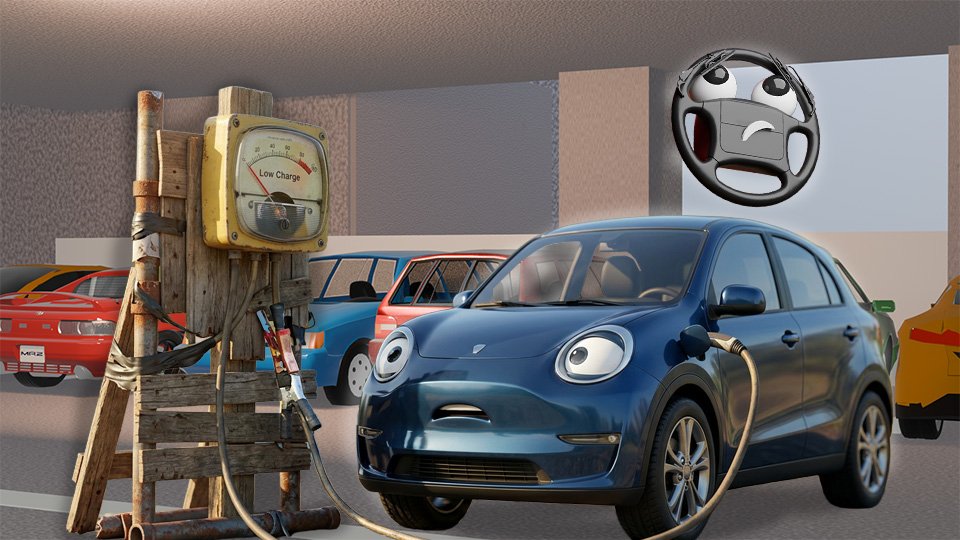
EV Charging Levels Explained (Level 1, 2, and DC Fast Charging)

Level 1, Level 2, and DC Fast Charging aren’t just speed tiers — they’re genuinely different equipment doing genuinely different jobs.

Amanda’s cousin bought an EV recently and mentioned, with visible pride, that he’d just gotten “Level 2” installed in his garage — a phrase Amanda nodded along to with total confidence and zero actual understanding of what tier she was even supposed to be picturing above or below it.

🔌 Level 1: The Outlet You Already Have

Level 1 charging uses a standard 120-volt household outlet, with no special equipment required beyond the cable that came with the car. It’s genuinely slow, typically adding only 3–5 miles of range per hour.

As the average range of an EV sits at around 300 miles, you can imagine how long it will take to reach that number at 5 charging miles per hour.

⚡ Level 2: The Real Home-Charging Answer

Level 2 uses a 240-volt circuit — the same voltage tier as an electric dryer — either through a dedicated unit installed by an electrician or a portable unit plugged into a 240V outlet. It adds roughly 20–40 miles of range per hour, meaning a full overnight charge comfortably covers even a longer-than-average day.

Taking the average charging time of 30 miles per hour, plugging in your EV when you go to bed gives you a solid 240 mile range, assuming you sleep eight hours a night.

🚀 DC Fast Charging: Not a Home Option

DC Fast Charging delivers direct current at much higher power, found at public charging stations along highways — not something installed at a house. It can add 60–80% of range in around 20–40 minutes, built for road-trip stops rather than daily home charging.

🔌 The Physical Connector Question

Most non-Tesla EVs in the U.S. use the J1772 connector for Level 1 and Level 2 charging. Worth confirming compatibility for your specific vehicle before assuming any charger or adapter will simply work.

🏠 What Most Home EV Owners Actually Land On

For most daily drivers, a Level 2 home setup is the real sweet spot — fast enough for a full overnight charge, without the cost and complexity of DC fast charging equipment at home.

🛠️ Gear Worth Having

Portable Level 1/2 EV Charger (J1772) — a flexible, plug-in option that covers both Level 1 and Level 2 charging without a hardwired install.

ChargePoint Home Flex Level 2 EV Charger — a dedicated, hardwired Level 2 unit for anyone ready to commit to a permanent home charging setup.

As an Amazon affiliate, I earn from qualifying purchases. Thank you for supporting GrumblePark.

🔗 Related Reads


GrumblePark is part of the WhistleBump Group — find the rest of the family at WhistleBump.com.

43006

©2026 John D Reinhart/GrumblePark.com — All rights reserved
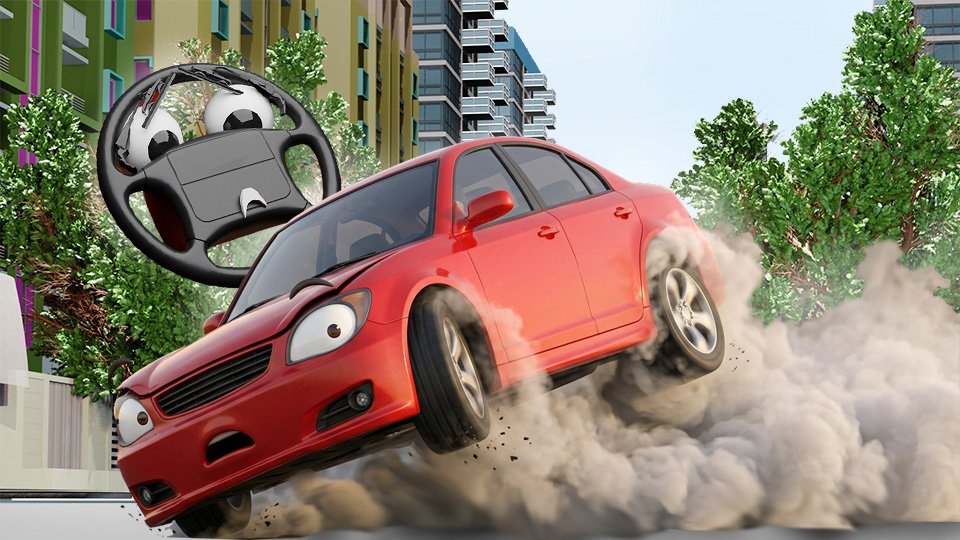
How ABS Actually Works (and Why the Pedal Pulses)

That pulsing you feel through the pedal during hard braking isn’t a malfunction. It’s ABS doing exactly what it’s designed to do.

Armando slammed the brakes once to avoid a deer, felt the pedal pulse rapidly under his foot, and spent the rest of the drive genuinely convinced something had just broken — when in fact something had just worked exactly as intended, for the first time he’d ever actually needed it to.

🔒 What Wheel Lockup Actually Costs You

When you jam on the brakes, the brake calipers seize the wheel rotors with all their power. This immediately stops the wheels from rotating, causing the tires to skid across the pavement.

A locked, skidding tire — one that’s stopped rotating but is still sliding across the pavement — generates less friction, and therefore less stopping power, than a tire that’s still rotating right at the edge of traction.

A locked wheel also can’t provide any steering control at all — a skidding car goes wherever momentum carries it, not wherever the wheel is pointed.

⚙️ What ABS Actually Does About It

Anti-lock Braking System uses a sensor at each wheel to detect the exact moment a wheel is about to lock up, then rapidly releases and reapplies brake pressure at that wheel — many times per second, far faster than you could ever manually pump the brakes — keeping each wheel right at the edge of traction instead of fully locked.

Instead of skidding out of control, the tires are still in contact with the pavement, giving you time to manage the steering, until the cars slows to a stop.

📳 Why the Pedal Pulses

That rapid apply-release cycling is mechanically transmitted straight back through the brake lines to the pedal itself, which is exactly why you feel a pulsing or slight vibration under your foot during an ABS event.

It’s the physical sensation of the system doing its job many times per second, not a sign of a problem.

✅ The Correct Response: Keep Pressing, Don’t Pump

With ABS, the correct technique is to press the pedal firmly and hold it. Let the system handle the rapid pulsing on its own.

Manually pumping the brakes, the old pre-ABS technique, actually works against the system and can reduce its effectiveness.

🚨 What an ABS Warning Light Means

A separate ABS warning light on the dashboard, distinct from the general brake warning light, means the anti-lock system has detected a fault and disabled itself.

Normal hydraulic braking still works, but you’ve lost the anti-lock protection specifically.

This is a genuine “get it looked at” light, not an emergency, but worth acting on rather than ignoring.

🛠️ Gear Worth Having

Autel AL319 OBD2 Scanner — an affordable way to read exactly what triggered an ABS warning light instead of guessing.

Innova 5610 OBD2 Scanner — a step up with ABS-specific diagnostic support, for a more detailed reading of what’s going on.

As an Amazon affiliate, I earn from qualifying purchases. Thank you for supporting GrumblePark.

🔗 Related Reads


GrumblePark is part of the WhistleBump Group — find the rest of the family at WhistleBump.com.

45004

©2026 John D Reinhart/GrumblePark.com — All rights reserved
Brake Fluid: Why It Needs Changing Even If Nothing Feels Wrong

Brake fluid can look completely fine and still be quietly failing at its actual job. Here’s why the schedule matters more than the appearance.

Amanda checked her brake fluid reservoir once, saw a clear, healthy-looking fluid sitting right at the fill line, and concluded there was nothing to think about here — a reasonable read of the wrong signal, since brake fluid’s real problem is invisible to a glance.

🥾 A Quick Reminder of Why Brake Fluid Exists at All

Your brakes work because liquids don’t compress — pressing the pedal pushes fluid through sealed lines to each wheel, and that fluid pressure is what squeezes the pads against the rotor.

The whole system depends on that fluid staying, essentially, a pure, incompressible liquid the entire time.

💧 The Property That Actually Matters Isn’t Visible

Brake fluid is hygroscopic — a word that just means it actively absorbs moisture from the air over time, even inside a sealed system.

That absorbed water doesn’t change the fluid’s color or clarity in any way you’d notice by eye. The fluid can look perfect and still be quietly failing.

🔥 Why Absorbed Water Is the Real Danger

Water has a dramatically lower boiling point than brake fluid. Under hard, sustained braking — a long downhill grade, aggressive stop-and-go driving — heat can boil that absorbed moisture into tiny gas bubbles inside the lines. Gas compresses; fluid doesn’t.

A bubble in the line means a soft, less effective pedal exactly when maximum stopping power matters most.

📅 Why the Interval Is Time-Based

Because moisture absorption happens continuously regardless of mileage or driving style, brake fluid service is recommended on a time interval — commonly every two years — rather than a mileage figure.

A fluid that looks perfectly clear at 23 months can already have absorbed enough moisture to matter.

🧪 How to Actually Know, Rather Than Guess

A small handheld tester checks moisture content directly in seconds — genuinely the only way to know for certain whether the two-year interval is conservative or already overdue for your specific car and climate.

The change itself — flushing old fluid and bleeding the lines — is real mechanical work best left to a shop; the value here is knowing when to ask for it, not doing it yourself.

🛠️ Gear Worth Having

ITEQ Brake Fluid Tester Pen — an actual moisture-content reading in seconds, rather than guessing from the fluid’s appearance.

Prestone DOT 3 Brake Fluid — confirm your vehicle’s specified DOT rating first — worth having on hand once a mechanic confirms it’s time.

As an Amazon affiliate, I earn from qualifying purchases. Thank you for supporting GrumblePark.

🔗 Related Reads


GrumblePark is part of the WhistleBump Group — find the rest of the family at WhistleBump.com.

45003

©2026 John D Reinhart/GrumblePark.com — All rights reserved
How Brake Bleeding Works (and Why Air in the Lines Is a Problem)

Air in the brake lines does something specific and dangerous, and bleeding the system is exactly how a mechanic gets it out.

Amanda’s mechanic mentioned bleeding the brakes after a fluid change, a phrase that always sounded faintly medical and slightly alarming to her, and that she’s never actually had explained in plain terms. This one’s worth understanding as a concept — it’s genuinely a job for a shop, not a driveway project, but knowing why it matters helps you understand what you’re paying for.

🪡 Why Air Is the Enemy of a Hydraulic System

Brake fluid works because it’s incompressible — pressure applied at the pedal transmits instantly and fully through the lines to the calipers. Air, unlike fluid, compresses easily. Even a small air bubble trapped in the line absorbs some of that pedal pressure by compressing instead of transmitting it, which is exactly what produces a soft, spongy pedal.

🔧 How Air Gets In Anytime the System Is Opened

Any time a brake line is disconnected — replacing a caliper, a hose, or doing a full fluid flush — air enters the system the moment it’s opened up. Bleeding isn’t an optional extra step after this kind of work; it’s the necessary last step that makes the repair actually functional.

🔁 What a Mechanic Is Actually Doing

Working one wheel at a time, a small valve at each caliper gets briefly opened while fluid is pushed through, forcing out any trapped air along with a bit of old fluid — repeated until only clean, bubble-free fluid comes out. It’s genuinely fiddly, precise work, done in a specific order for your particular car.

🧪 How You’d Actually Notice This Is Needed

A pedal that’s gone soft or spongy — sinking further than normal before the brakes actually engage — without an obvious fluid leak is the classic sign air’s gotten into the system somewhere. That’s the detail worth relaying to a mechanic exactly as you feel it.

🧭 Why This Is Explicitly Not a First DIY Project

Getting the order wrong, or letting the fluid reservoir run low mid-process, can actually introduce more air rather than remove it — the opposite of the intended outcome. This is one of the more precise procedures on the whole site, and it’s worth treating it that way: understand why it matters, then let a shop actually do it.

🛠️ Gear Worth Having

ITEQ Brake Fluid Tester Pen — confirms fluid condition once a mechanic’s finished a bleed, before you’re back on the road.

As an Amazon affiliate, I earn from qualifying purchases. Thank you for supporting GrumblePark.

🔗 Related Reads


GrumblePark is part of the WhistleBump Group — find the rest of the family at WhistleBump.com.

45009

©2026 John D Reinhart/GrumblePark.com — All rights reserved
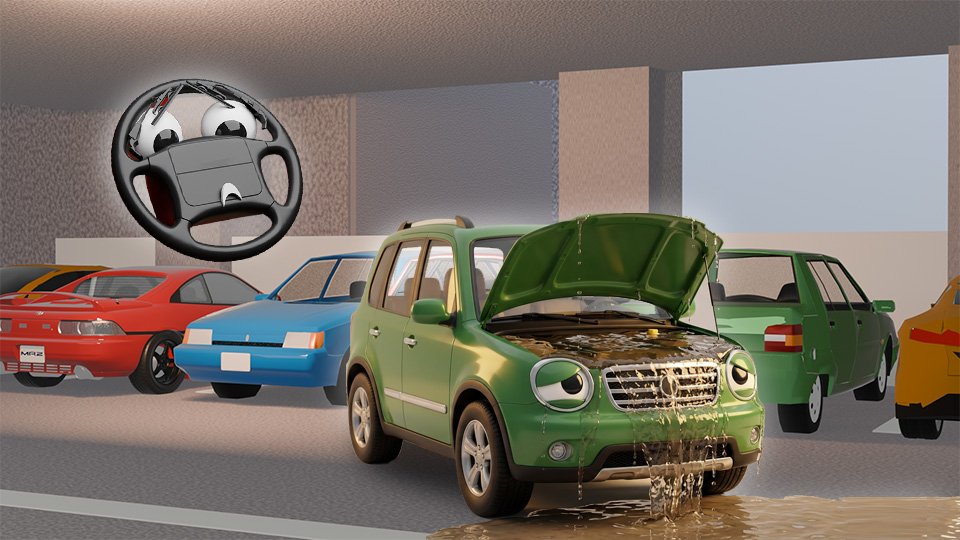
Overfilling vs. Underfilling: Why Both Are a Problem

More fluid is not automatically better. Overfilling can genuinely hurt your engine, not just underfilling.

Amanda’s instinct, when checking a fluid and finding the level a little low, has always been to just keep adding a bit more “to be safe” — reasoning that if some fluid is good, more fluid can only be better. It’s an understandable instinct, and it’s exactly backwards for several of the fluids covered across this whole category.

📉 Why Underfilling Is the Obvious Half of the Problem

Low fluid means whatever job that fluid does — lubricating, cooling, transmitting force — gets done less effectively, or not at all in the worst spots. This is the half of the story most people already understand intuitively, and it’s why a low-level warning light gets taken seriously.

📈 Why Overfilling Engine Oil Specifically Causes Real Damage

Too much oil in the engine lets the spinning crankshaft actually contact the pooled oil at the bottom, whipping it into a foam full of tiny air bubbles. Foamy oil doesn’t lubricate properly — it compresses instead of cushioning, which can starve bearings of proper lubrication even though the dipstick technically shows “plenty.” More is not better here; more is a different problem.

💧 Coolant: Room Needed for Expansion

A coolant system needs a little empty space at the top, because the fluid expands as it heats up. Overfilled coolant has nowhere to go and can be pushed out through the overflow the moment the engine reaches operating temperature — which looks like a leak, isn’t actually a leak, and just means it was filled past the max line to begin with.

🛑 Brake and Power Steering Fluid: A Tighter Margin

These reservoirs are sized deliberately close to their working volume. Overfilling either can cause fluid to be pushed out through a vent or seal as the system heats up during normal driving — a slow, sticky mess rather than a dramatic failure, but a mess worth avoiding.

✅ The Actual Rule

Fill to the middle of the marked range, not the top of it, whenever a fluid gives you a range rather than a single line — and if you’re not sure, checking again after a short drive, once everything’s reached normal operating temperature, beats guessing on the first pass.

🛠️ Gear Worth Having

EWK Flexible Oil Funnel — a controlled, gradual pour makes it far easier to stop right at the line instead of overshooting.

Antifreeze/Coolant Refractometer — confirms concentration is correct too, not just that the level looks right in the reservoir.

Vehicle Maintenance Log Book — note what level you filled to — useful context the next time you check, so you’re comparing against a real number, not memory.

As an Amazon affiliate, I earn from qualifying purchases. Thank you for supporting GrumblePark.

🔗 Related Reads

  • How to Check Your Fluid Levels in Under Five Minutes
  • Engine Oil: What It Actually Does Beyond “Lubrication”
  • Coolant: Why It’s Not Just Water and Why the Color Matters

GrumblePark is part of the WhistleBump Group — find the rest of the family at WhistleBump.com.

41010

©2026 John D Reinhart/GrumblePark.com — All rights reserved
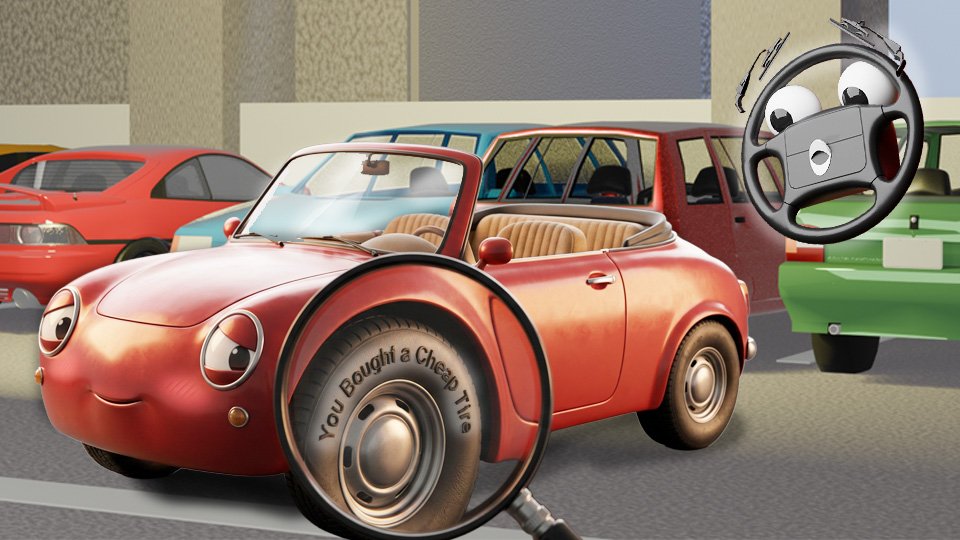
How to Read a Tire’s Sidewall

Those cryptic numbers stamped on your tire aren’t decoration — here’s what they actually tell you.

Armando has owned his car for four years and has crouched next to this exact tire dozens of times, and every single time his eyes land on “P215/65R16 95H” and slide right off it like it’s written in a language his car speaks but he doesn’t. It’s embossed permanently into the rubber, which means somebody at some point decided this information was important enough to be there forever. Nobody ever told him what it meant. That’s a gap, not a character flaw, and it’s a fixable one in about four minutes.

If you’ve ever looked at your own tire and felt the same low hum of “this is clearly a code and I am clearly not the one it was written for,” you’re in good company. Let’s break it.

Draw the curtains while you read this – make sure nobody sees you. Eat this page when you’re done. This stuff must be top secret:

🔍 The Tire, Introduced (Since Nobody Ever Actually Does This)

Before diving into the alphabet soup on the side of your tire, it helps to know what you’re actually looking at, because “tire” is doing a lot of work covering several different parts most people have never bothered to name.

  • The tread is the thick, grooved part actually touching the road — those grooves aren’t decoration, they’re channels for water and grip to escape through.
  • The sidewall is the tall, smooth-ish vertical wall running up from the road to the wheel — and it’s also, conveniently, the exact spot where all those size codes and ratings live, which is why we’re here.
  • The shoulder is where the tread curves over into the sidewall, and it’s the part that quietly does extra work every time you take a corner, since that’s where the tire’s weight shifts under a turn.
  • And way down at the very bottom edge, where the tire clamps onto the metal wheel and holds the air in, is the bead — not glamorous, but doing the unglamorous job of keeping the whole thing sealed shut.

One more thing worth clearing up while we’re here: the black rubber part is the tire. The silver or painted metal part it’s mounted on is the wheel. People use the two words interchangeably all the time, and now you officially don’t have to.

🔤 P215/65R16: The Size Code, Decoded

Each character in this string is doing a specific job:

P215/65R16

P = the tire’s class (“P” for passenger vehicle; you’ll also see “LT” for light truck, which means a heavier-duty tire built for towing and hauling).

215 = the tire’s width in millimeters, measured sidewall to sidewall at the widest point.

65 = the aspect ratio — the sidewall’s height expressed as a percentage of the width. The 65 means the sidewall is 65% as tall as the tire is wide – it’s pretty much a standard size. A lower number, say, 35, means a shorter, stiffer sidewall, great for cornering but super bumpy on rough road; a higher number means a taller tire, offering a more cushioned ride.

R = radial construction, meaning the internal fabric plies run radially (perpendicular to the direction of travel) rather than diagonally. Nearly every tire made today is radial; you’re unlikely to see anything else, but the letter’s still there.

16 = the wheel diameter, in inches, that the tire is built to fit. This one’s non-negotiable — it has to match your wheel exactly.

⚖️ 95H: Load Index and Speed Rating

The two characters right after the size code are a second code, and they matter just as much as the first:

95 = the load index, a number that corresponds to a maximum weight the tire can safely carry, per a standardized industry chart (95 works out to 1,521 pounds per tire, for context — the chart is easy to find with a quick search if you want your exact number).

H = the speed rating, the maximum sustained speed the tire is rated to handle under load. It’s an engineering ceiling, not a suggestion, and not a challenge, no matter what the number tempts you to do on an empty highway at 6 a.m.

📅 DOT XXXX: The Birth Certificate

Somewhere else on the sidewall you’ll find a code starting with “DOT,” ending in four digits — the last four are the important ones. The first two are the week of manufacture, the last two are the year. “2324” means the 23rd week of 2024.

This matters because rubber ages even when it’s just sitting there doing nothing, the way a rubber band left in a junk drawer eventually turns brittle. Most manufacturers recommend replacing tires after six to ten years regardless of remaining tread — a tire can look fine and still be past its structural prime.

🧭 The Tire Store: Why None of This Is Trivia

This isn’t a party-trick decoder ring.

When you go to buy a new tire, take a picture of the sidewall numbers into the store with you .

You will have the exact information you need to buy a matching replacement tire. Here’s why it matters:

  • Mismatched sizes can throw off your speedometer
  • Mismatched sizes can stress the drivetrain on an all-wheel-drive vehicle
  • Under-rated tires can’t legally handle your vehicle’s weight
  • And, a perfectly good-looking tire could quietly be sitting there, looking good long past its expiration date.

AND: the next time you’re standing next to your own tire, you’ll know exactly what it’s telling you.

🛠️ Gear Worth Having

Accutire Digital Tire Gauge — a lit display makes checking the pressure that goes with all that sidewall math painless, even in a dim driveway.

JACO ElitePro Tire Pressure Gauge — a steel-braided hose and brass internals for anyone who wants a gauge that outlasts the car.

GODESON Digital Tire Tread Depth Gauge — since you’re already crouched down reading the sidewall, might as well check the tread while you’re there.

As an Amazon affiliate, I earn from qualifying purchases. Thank you for supporting GrumblePark.

🔗 Related Reads

  • The Penny Test and What Tread Depth Actually Means
  • How to Check for Alignment Problems Without a Shop Visit
  • How to Choose the Right Tires for Your Driving

GrumblePark is part of the WhistleBump group – find the rest of the family at WhistleBump.com.

46001

©2026 John D Reinhart/GrumblePark.com — All rights reserved
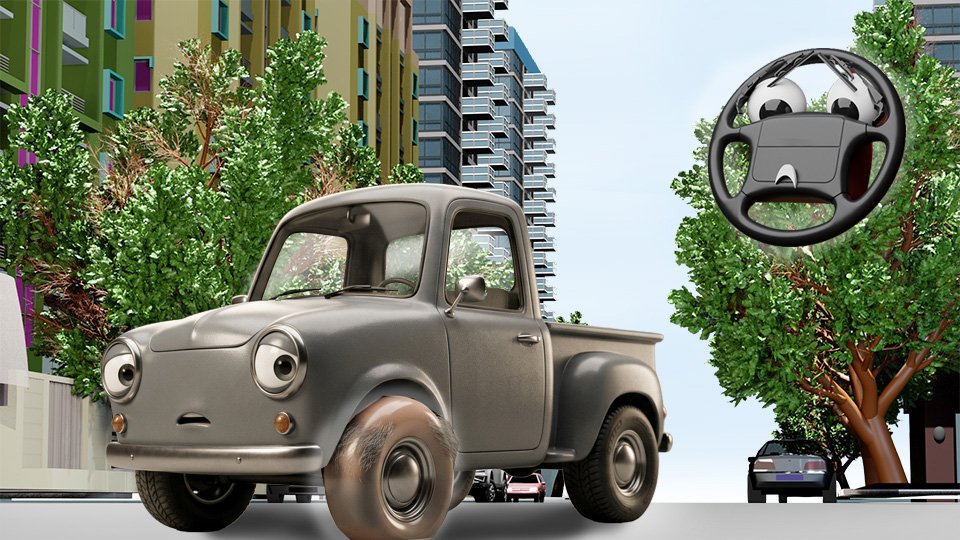

Reading Uneven Wear Patterns (What Your Tires Are Telling You)

Your tires are trying to tell you something. Here’s how to read the message before it gets expensive.

Armando runs a hand across a tire at a gas station one afternoon and notices the outside edge is noticeably balder than the inside — the exact moment he realizes his car has been quietly narcing on his maintenance habits to anyone who bothers to check.

Because it has. Tires wear in specific, readable patterns, and each one points at a specific cause. Here’s the decoder — no tools required, just your hand and a couple minutes.

🛞 How Your Tires Actually Work

Every single thing a tire does — gripping in a straight line, braking, cornering — comes down to one small patch of rubber, roughly the size of your hand, actually touching the road at any given moment.

There’s no separate section built exclusively for “going straight” and another built exclusively for “turning.” It’s the same rubber doing the same basic job everywhere on the tire, and that job is simply staying pressed flat and even against the road. When you turn a corner, the car’s weight shifts and leans onto the outer edge of the tire for that moment, so the edges do pick up more of the work then — but the second you straighten out, the load spreads back evenly across the whole tire again.

That’s exactly why proper inflation matters, and exactly why your tire’s wear pattern is basically a diary of how it’s actually been treated. Correct pressure keeps that whole contact patch flat against the road, sharing the workload evenly the way it’s supposed to. Too much or too little air throws that balance off — pushing more weight onto the center or the edges than they were ever meant to carry — and every mile you drive on it wears exactly the part carrying the extra load. Nothing about that tire is lying to you. It’s just showing you, in rubber, precisely where the weight’s actually been sitting.

🎯 Center Wear = Overinflation

If the middle strip of tread is noticeably more worn than both edges, the tire’s been over-inflated: running with too much air.

Stretch your hand as wide as you can. Now press it against a table. Which part touches first? That’s exactly like an overinflated tire: the center touches first.

Since the center of the tire is going the work of gripping the road, the edges barely get invited to the party.

🥣 Edge Wear (Both Sides) = Underinflation

Now cup your hand and put it on the table. That’s what underinflation looks like – it still holds the tire shape, but the center has no pressure on it.

The center tread looking good while the outer edges are worn down means it’s been riding on its two shoulders instead of laying flat like it’s supposed to.

That means only the outer edges of the tire are doing the work meant for the whole tire.

↔️ One-Sided Edge Wear = Alignment

Wear on just one edge — not both — isn’t a pressure problem at all.

It’s your wheel alignment quietly confessing that it’s off.

“Alignment” just means the angle your wheels actually point compared to the angle they’re supposed to point. Essentially, when the car is going straight, all four tires, if properly aligned, go straight, too. If one is off, it runs at a slight angle to the direction of travel.

When a wheel’s off even a little, one edge of the tire drags against the road more than the rest of it, the whole time you’re driving, without you ever feeling a thing.

🐪 Cupping or Scalloping = Suspension or Balance

Here’s the one that needs a little more unpacking.

Your car’s suspension — the springs, shocks, and struts working together — is what keeps each tire pressed evenly against the road as you drive over every bump, dip, and pothole, instead of bouncing wildly like a shopping cart with a bad wheel.

Shocks and struts specifically are like built-in bouncers: their whole job is to soak up that bounce so the tire stays planted instead of hopping. When one of those parts wears out, the tire starts bouncing against the road ever so slightly instead of staying smoothly planted.

A wheel that’s out of balance (meaning its weight isn’t evenly distributed all the way around) does the same kind of bouncing and leaves the same kind of clue.

Those repeated little hop wear out the tire tread in a rhythmic, scalloped pattern around the tire, almost like a wave pattern, instead of one smooth strip.

🧭 Why Catching This Early Matters

Wear patterns are basically a free diagnosis you can read with your bare hand, before a cheap alignment or pressure fix turns into an entire set of tires, replaced years ahead of schedule because nobody happened to run a hand across them.

Next time you’re out by the car, just take a look at your tires. You’ll be surprised at how much just this little bit of knowledge will help you read what’s going on down there.

Take it to a gas station to fix the over/under inflation issues – use the station’s air gauge to get them all to the same pressure.

If you see the uneven situations – worn on only one side or in a pattern – you can take the car to a tire shop for an alignment on your terms before any real damage is done to them.

🛠️ Gear Worth Having

GODESON Digital Tire Tread Depth Gauge — compare readings across the tire’s width to catch a pattern early, not just guess by eye.

TEKTON 1/2″ Drive Click Torque Wrench — unevenly torqued lug nuts can cause vibration wear that mimics a balance problem — rule it out.

Accutire 5941 Digital Tire Gauge — confirm pressure is actually correct before assuming the pattern points to alignment or suspension.

As an Amazon affiliate, I earn from qualifying purchases. Thank you for supporting GrumblePark.

🔗 Related Reads

  • How to Check for Alignment Problems Without a Shop Visit
  • How to Rotate Your Tires (and Why the Pattern Matters)
  • The Penny Test and What Tread Depth Actually Means

GrumblePark is part of the WhistleBump group – find the rest of the family at WhistleBump.com.

46006

©2026 John D Reinhart/GrumblePark.com — All rights reserved

Bug and Tar Removal Without Damaging Your Paint

Bug guts are acidic and tree sap doesn’t budge with soap. Here’s how to get both off without a scrub-induced scratch.

Meta description: Bug guts are acidic and tree sap doesn’t budge with soap. Here’s how to get both off without a scrub-induced scratch.

SEO tags: bug removal, tar removal, tree sap, paint safe cleaning, road grime

Bug and Tar Removal Without Damaging Your Paint

Armando drove three hours down a rural highway one summer evening and arrived with a front bumper that looked, by his own description, “like a crime scene for insects.” His instinct was to scrub. His instinct was wrong, and it’s the same wrong instinct most people have.

🪲 Why Bug Splatter Is Worse Than It Looks

Yeah, they’re gross – eyeballs and guts and wings and stuff glued right there to the front of your car. Some cars wear them as a badge of honor: hard-earned highway stripes.

But, here’s the problem with that: bug remains are acidic.

That acidity actively etches into your car’s clear coat the longer it sits — baked on by sun and highway heat, a fresh splatter that would rinse off in seconds can become a permanently etched mark within days if ignored.

If pitted paint is your thing, this is great news.

For the rest of us, speed matters way more than technique here.

❌ The Scrubbing Instinct Is the Problem

Anybody’s first instinct would be to grab a rag and wipe away those remains. Maybe some water to help loosen it. That would work if the bug or the tar was clean, and the spot where they hit your car was, well, spotless.

Sadly, very little in the automotive world, especially highway travel, is spotless.

Scrubbing dried bug residue or tar with a rag actively grinds whatever grit is embedded in it directly across your clear coat — creating the exact fine scratches a careful wash is trying to avoid.

The fix isn’t more elbow grease; it’s the right chemical doing the work instead of your arm.

🧪 Let the Product Dissolve It First

A dedicated bug and tar remover is formulated to break down the squashed bug’s chemical stickiness, breaking its bond to the paint on its own.

Spray it on, give it the adhesive-loosening time the label specifies (usually a minute or two), and it should wipe away with minimal pressure.

If you’re pressing hard to make progress, you’re back to grinding the bug into the paint. Give the product more time, as it hasn’t finished working yet; give it more time rather than more force.

🛣️ Tar Is a Different Animal

Like a dropped egg, a bug hit is all about managing the stickiness of its protein guts.

But splothces of stuff like road tar and asphalt won’t respond to a standard bug remover the same way. These man-made chemicals are petroleum based.

Luckily, there are products specifically rated for tar and adhesive removal. They won’t work on squashed bugs any better than bug-removers work on tar. You’ll need both!

🌲 And Then There’s Tree Sap

Park under the wrong tree for an afternoon and you’ll come back to find little amber blobs stuck to your hood or windshield, looking like your car sprang a leak from somewhere above.

Sap isn’t bug guts, and it isn’t tar. It’s basically a tree’s version of glue, and the longer it sits in the sun, the more it hardens — going from a soft, sticky drop to something closer to a tiny cemented rock glued to your paint.

It’s also mildly acidic on its own, same as bug splatter, so it deserves the same urgency: the longer it bakes there, the better its odds of leaving a stain or a dull spot behind even after you finally scrape the thing off.

The good news, if it’s fresh: a warm, damp cloth alone can soften a new drop of sap enough to lift it right off, no chemicals required. If it’s had a few days to harden in the sun, a little rubbing alcohol on a cloth, held against the spot for a few seconds before wiping, breaks its stickiness down safely.

And if you’ve already got tar spots to deal with in the same wash, good news twice over — the same tar-and-adhesive remover handling your asphalt splatter takes care of sap too. One bottle, three different messes.

🛠️ Gear Worth Having

Chemical Guys Bug and Tar Remover — fast-acting and paint-safe, built specifically to dissolve rather than require scrubbing.

Griot’s Garage Smudge Remover — handy for general grime, scuffs, and oily smudges beyond just bugs and tar.

Rain-X Pro 3-in-1 Bug, Tar and Adhesive Remover — covers the tar-and-sticker-residue side of the job in one bottle.

As an Amazon affiliate, I earn from qualifying purchases. Thank you for supporting GrumblePark.

🔗 Related Reads


GrumblePark is part of the WhistleBump group – find the rest of the family at WhistleBump.com.

40008

©2026 John D Reinhart/GrumblePark.com — All rights reserved
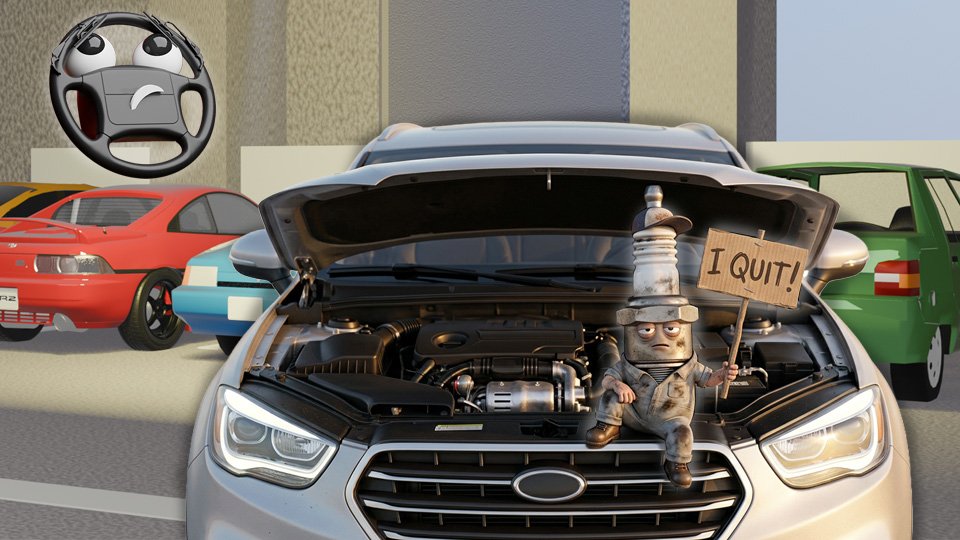
Spark Plugs: When and Why They Need Replacing

Spark plugs do their job thousands of times a minute and nobody thinks about them until a mechanic says the word. Here’s how to know if he’s right.

Armando knows spark plugs exist, knows they’re somewhere in the engine, and has never once had a clear picture of what they actually do beyond a vague sense that they’re related to “the spark that makes the car go” — which, it turns out, is basically correct.

But the day’s going to come when his mechanic is going to tell him “you need new spark plugs” and he’s going to wonder if this is a needless upsell or the real deal.

⚡ How a Spark Plug Actually Makes the Engine Run

Your engine makes power through a repeating four-step cycle happening inside each cylinder, over and over, thousands of times a minute.

  • First, the piston pulls down and draws in a mix of air and fuel.
  • Second, the piston pushes back up, squeezing that mixture into a small, dense pocket.
  • Third — and this is where the spark plug comes in — right at the exact top of that squeeze, the spark plug fires a tiny, precisely timed spark that ignites the compressed mixture, and that controlled explosion is what actually shoves the piston back down with real force.
  • Fourth, the piston rises one more time to push the spent exhaust out, and the whole thing starts over.

That’s the entire power stroke, the one moment in the whole cycle that produces the push driving your car forward.

The spark has to land at exactly the right instant.

A worn spark plug doesn’t fire cleanly or reliably at that precise moment anymore, so this whole cycle starts running a little sloppy, in every cylinder, every single time it repeats — which, at highway speed, is thousands of times a minute.

📉 Why They Wear Out At All

A spark plug’s whole job is turning your car’s ordinary, low-power electricity into something strong enough to jump through air — which normally doesn’t conduct electricity at all. A part called the ignition coil takes your car’s everyday 12 volts and boosts it up to tens of thousands of volts, way more forceful than usual. That huge jolt arrives at the plug and punches across a tiny gap between two metal points, creating a spark hot enough to instantly ignite the fuel-air mixture sitting right there waiting for it. That spark has to land at exactly the right split second, every single time, thousands of times a minute — which is exactly the timing that goes haywire if something in the system (like a distributor put in backwards) throws it off.

Every single spark erodes the plug’s metal tip by a tiny amount — nothing you’d ever notice from one firing, but multiplied across millions of firings over months and years, that erosion gradually widens the gap the spark has to jump, weakening it. It’s not a defect. It’s just gradual, expected wear from doing its job correctly, over and over, for a very long time.

🚨 What You’d Actually Notice, Yourself, Before Any Mechanic Says a Word

This is the part worth knowing cold, because it’s your independent evidence, not something you have to take anyone’s word for. A rough, shaky idle at stoplights. Noticeably less pep when you accelerate. Worse gas mileage than usual. Trouble starting, especially on a cold morning. And if a check engine light comes on citing a “misfire,” that’s very often a spark plug problem at its root. If a mechanic tells you plugs need replacing and you’ve genuinely noticed one or more of these, that’s real corroboration — the story matches what you’ve actually experienced.

🗣️ How to Tell If a Mechanic’s Being Straight With You

If none of the symptoms above have shown up at all, and a mechanic brings up spark plugs anyway during an unrelated visit — an oil change, say — that’s worth a couple of direct, easy questions, not automatic suspicion, just genuine ones: “How many miles are on the current plugs, and what type are they — copper, platinum, or iridium?” That matters because the honest replacement interval swings wildly by type: standard copper plugs genuinely do wear out around 20,000–30,000 miles, while platinum or iridium plugs are built to last 60,000–100,000 miles or more. A mechanic pushing a plug replacement at 25,000 miles on a car that came with iridium plugs is asking you to replace something with most of its life left. A mechanic saying the same thing about a car that’s never had its original copper plugs touched at 90,000 miles is very likely telling you something true and overdue. Same request, two very different answers, and the mileage-and-type question is what tells them apart.

📖 Your Owner’s Manual Already Has the Real Number

Your car’s manufacturer specifies an exact recommended interval for your specific engine, sitting in the maintenance schedule section of your owner’s manual — genuinely worth a two-minute look before any conversation about spark plugs, so you’re comparing what a mechanic says against a real number instead of just trusting tone of voice.

🛠️ Gear Worth Having

Autel AL319 OBD2 Scanner — if a mechanic cites a misfire code, you can plug this in yourself and read the same code, so you’re confirming his diagnosis instead of just hoping he’s reading it right.

Vehicle Maintenance Log Book — your own written record of what’s actually been replaced and when, so “it’s probably time” from a shop can be checked against real dates instead of anyone’s memory, yours or theirs.

Haynes Repair Manual (for your specific vehicle) — confirms your exact car’s real manufacturer-recommended interval, so you walk into any conversation about this already knowing the right answer.

As an Amazon affiliate, I earn from qualifying purchases. Thank you for supporting GrumblePark.

🔗 Related Reads

GrumblePark is part of the WhistleBump group – find the rest of the family at WhistleBump.com.

42005

©2026 John D Reinhart/GrumblePark.com — All rights reserved